


Objectives
- Part 1: Access a Cisco Switch through the Serial Console Port
- Part 2: Display and Configure Basic Device Settings
- Part 3: Access a Cisco Router Using a Mini-USB Console Cable
Background / Scenario
Various models of Cisco routers and switches are used in all types of networks. These devices are managed using a local console connection or a remote connection. Nearly all Cisco devices have a serial console port to which you can connect. Newer models also have a USB console port.
In this Packet Tracer Physical Mode (PTPM) activity, you will learn how to access a Cisco device via a direct local connection to the console port, using the generic terminal emulation program in Packet Tracer. After you have established a console connection with the Cisco device, you can display or configure device settings. In this activity, you will only display settings and configure the clock in this lab.
Instructions
Part 1: Access a Cisco Switch through the Serial Console Port
In this part, you will connect a PC to a Cisco switch using a rollover console cable. This connection will allow you to access the CLI and display settings and configure the switch.
Step 1: Install and investigate a 2960 switch.
a. There are several switches, routers, and other devices on the Shelf. Click and drag the 2960 to the Rack. In Packet Tracer, most devices that you drag to the Rack or the Table are automatically connected to power. Some devices require that you turn on the power. However, a 2960 switch powers up as soon as you move it to the Rack.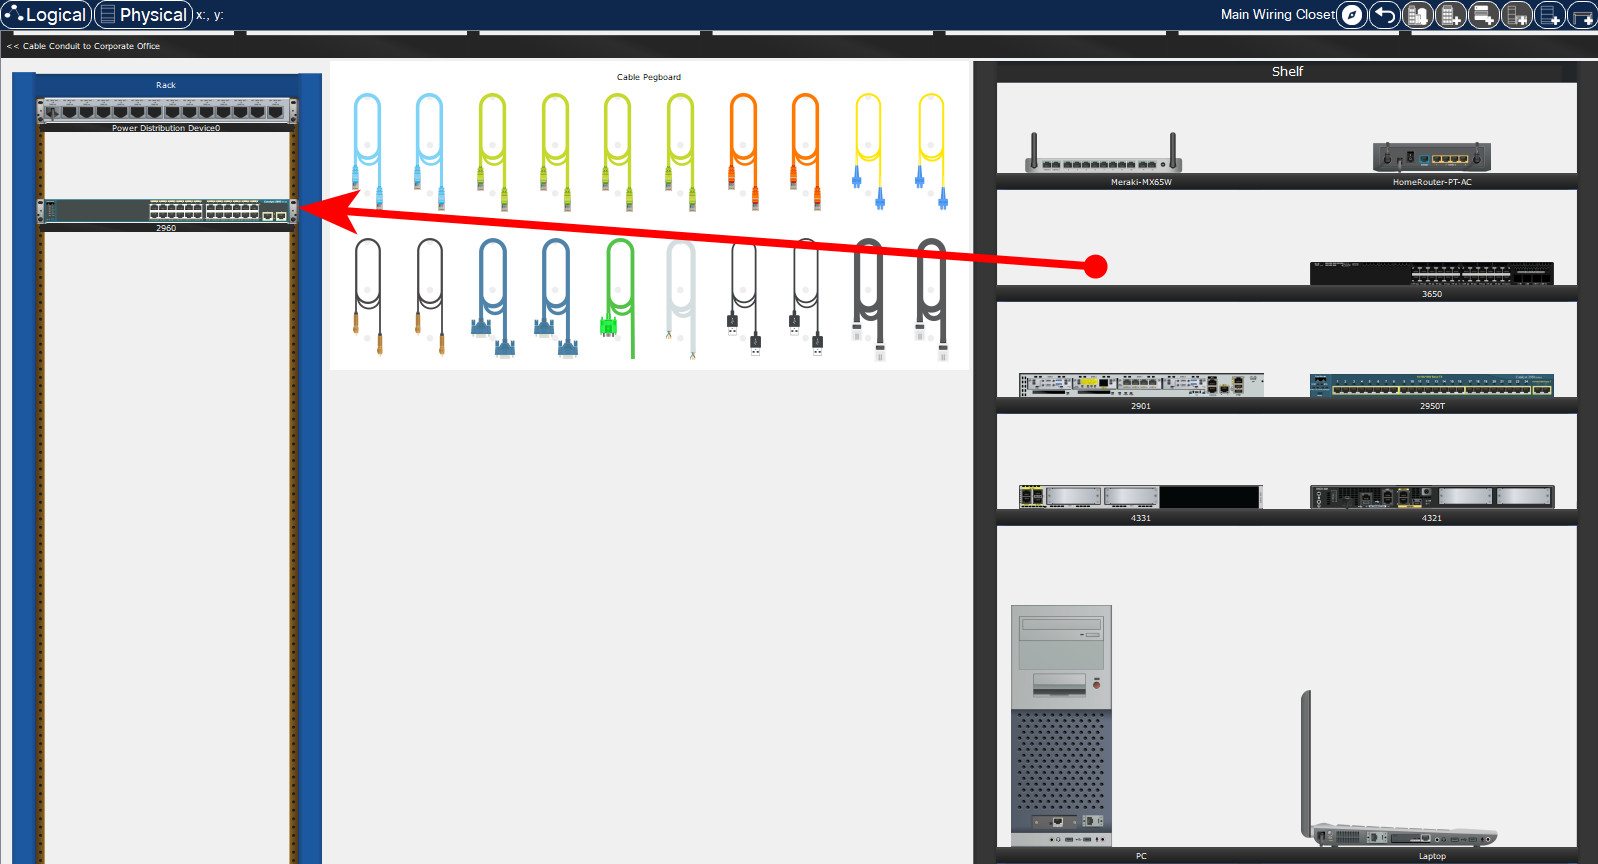
b. Right click the 2960 switch and select Inspect Front. Use the zoom tool to get a better view. Notice that there are 24 ports to connect users and two additional ports to connect the switch to other switches or routers.
c. Click the X to close the Inspect Front view.
d. Right click the 2960 switch and select Inspect Rear. Use the zoom tool to get a better view. Notice that there is a CONSOLE port for connecting a rollover cable to a PC.
e. Click the X to close the Inspect Rear View.
Step 2: Install and investigate the PC.
a. Click and drag the PC to the Table.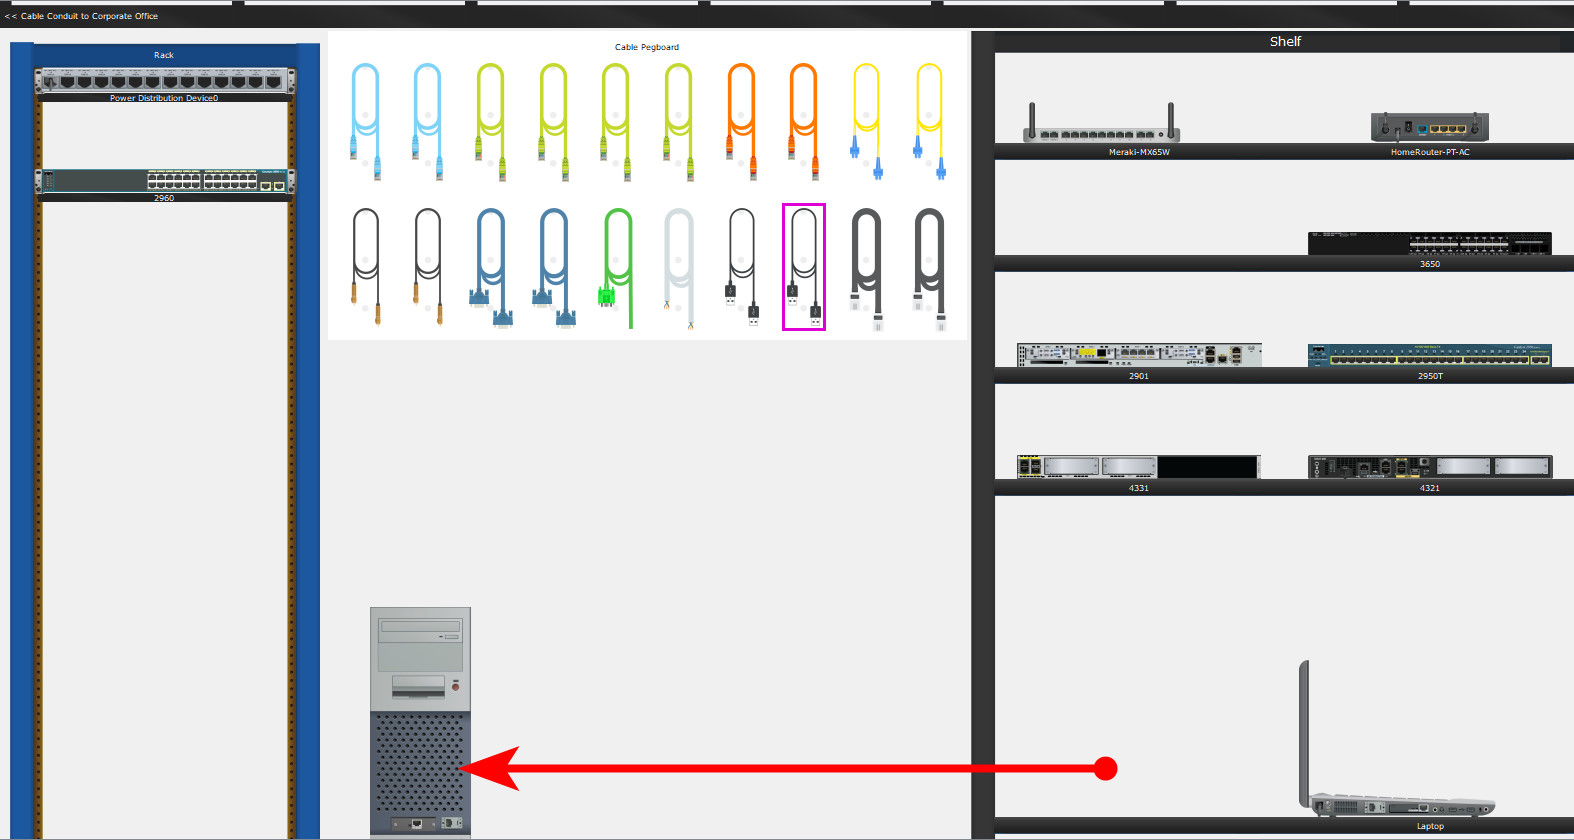
b. Right click the PC and select Inspect Front. Click the red power button to turn on the PC. You should now see a green light on the front of the PC. At the bottom of the PC, notice that there is a Fast Ethernet interface. Next to it is an RS 232 port for connecting a rollover cable. Below these are two USB ports that can also be used for console access.
Step 3: Connect the switch and PC using a rollover console cable.
a. On the Cable Pegboard, click a blue rollover console cable.
b. On the PC, click the R2 232 port.
c. Right click the 2960 switch and choose Inspect Rear.
d. Click the CONSOLE port to connect the rollover console cable.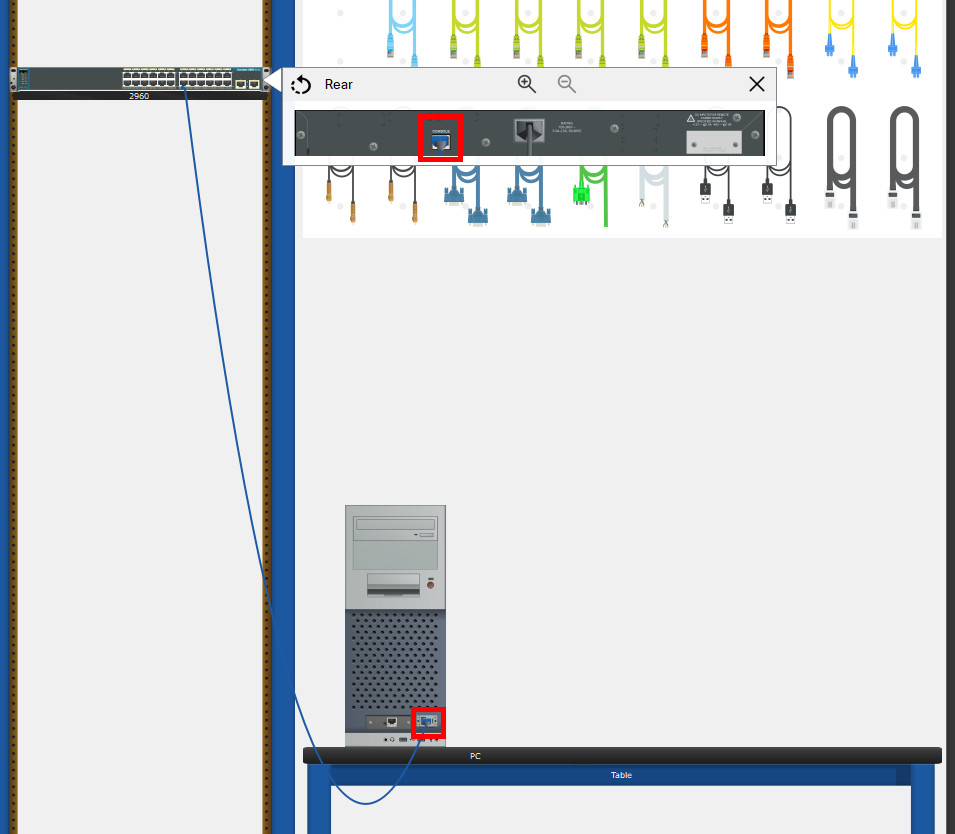
Step 4: Configure the Packet Tracer Terminal program to establish a console session with the switch.
Terminal is a terminal emulation program that was created specifically for Packet Tracer. This program allows you to access the terminal output of the switch. It also allows you to configure the switch.
a. Click PC > Desktop tab > Terminal. The default parameters for the console port are 9600 baud, 8 data bits, no parity, 1 stop bit, and no flow control. The Terminal default settings match the console port settings for communications with the Cisco IOS on the switch.
b. Click OK. The last line in the terminal output should be Press RETURN to get started!.
c. Press the ENTER key to get to the User EXEC mode switch prompt.
Cisco IOS Software, C2960 Software (C2960-LANBASE-M), Version 12.2(25)FX, RELEASE SOFTWARE (fc1)
Copyright (c) 1986-2005 by Cisco Systems, Inc.
Compiled Wed 12-Oct-05 22:05 by pt_team
Press RETURN to get started!
<ENTER>asd
Switch>
Part 2: Display and Configure Basic Device Settings
In this part, you are introduced to the user and privileged EXEC modes. You will determine the IOS version, display the clock settings, and configure the clock on the switch.
Step 1: Display the switch IOS image version.
While you are in the user EXEC mode, use the show version command to display the IOS version for the switch.
0 Comments